Set up custum domain with Github
A complete guide for custum domain for Github
Gitbub provides free static website hosting services. (If you have already setup your username.github.io page, you can skup this step.) To get started, create a new public repository named username.github.io. Ensure that the repository visibility is set to public.
Go to the repository named username.github.io in GitHub where your website is located. Click Settings:
-
Change the visibility to public. (If your repository is already public, you can skip this step.)

Scroll to the bottom of the Settings page, where the Danger Zone is located. Click Change visibility to make the repository public.

If you don’t know how to set the repository to public, check the GitHub documentation here.
Once your website is uploaded to the repository, you can access your GitHub Page using the following URL:
1
https://username.github.io
Make sure you replace username with your GitHub username (as it appears in the URL).
For more details, please check here.
GitHub with Costum Domain
Verfiy your domain in Github
If you have your own domain, you can host your website on GitHub. To direct traffic to your domain, you need to verify it in GitHub Pages.
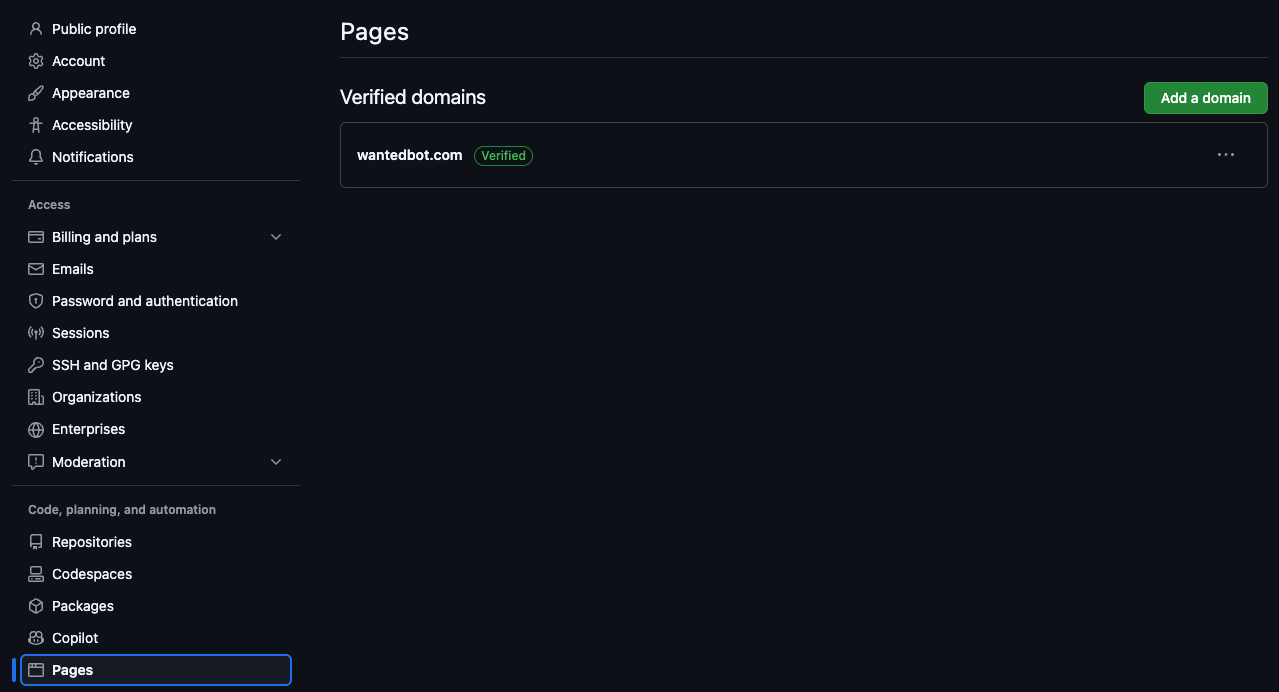
- Go to Settings in your repository.
- Click Pages.
- Then, click Add a domain to link your custom domain.
For more details, check the GitHub documentation here.
After clicking Add a domain and entering your domain name (e.g., wantedbot.com), GitHub will prompt you to verify your domain, as shown in the following figure:
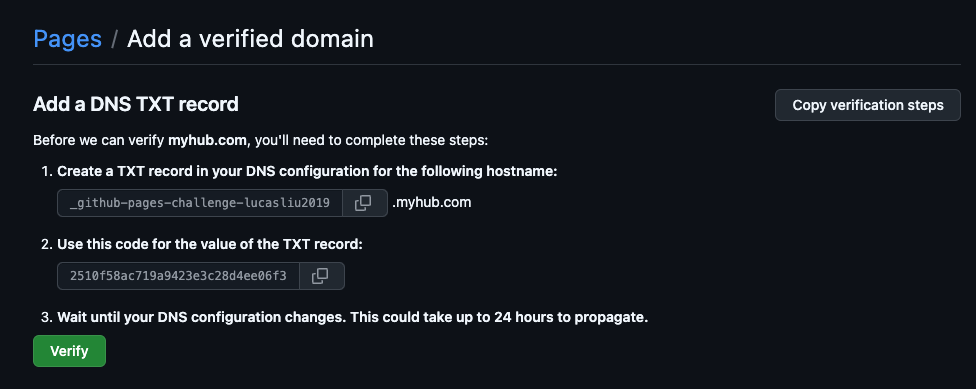
Save the hostname and value of the TXT record somewhere, as you will need them later. Do not click the “Verify” button yet.
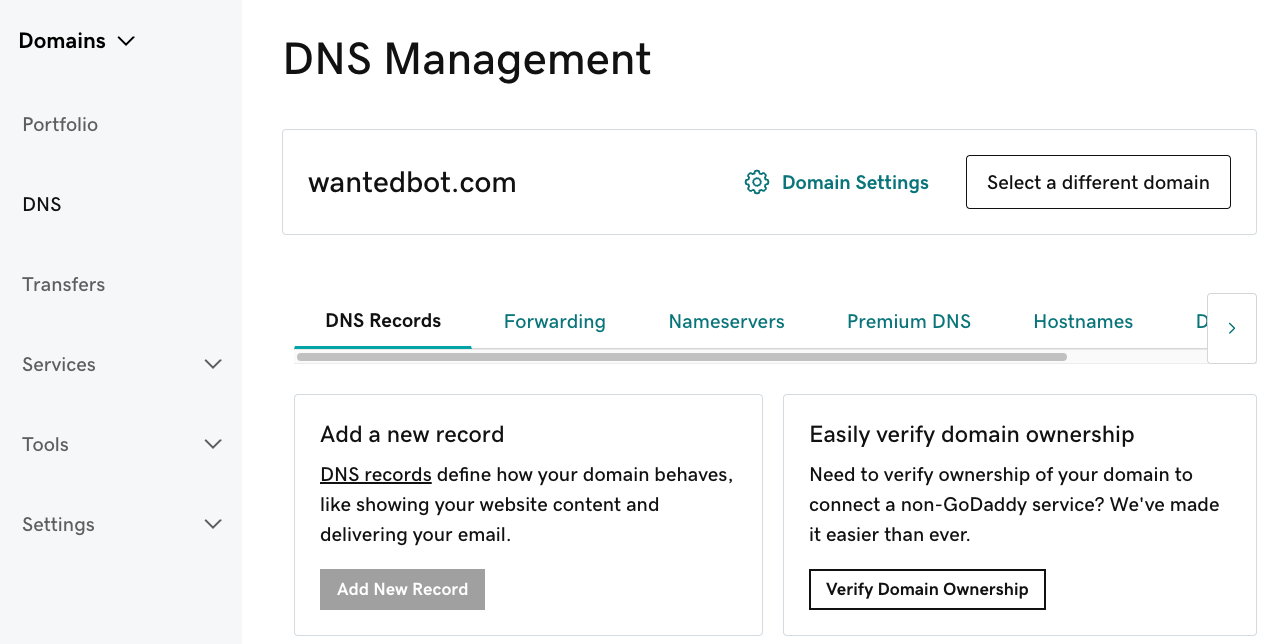
Next, we need to add a DNS TXT record to your domain’s DNS settings. For this example, we’ll use GoDaddy.
- Navigate to the DNS setup for your domain.
- The interface should look similar to the figure below, where you can add, modify, and view your DNS records.
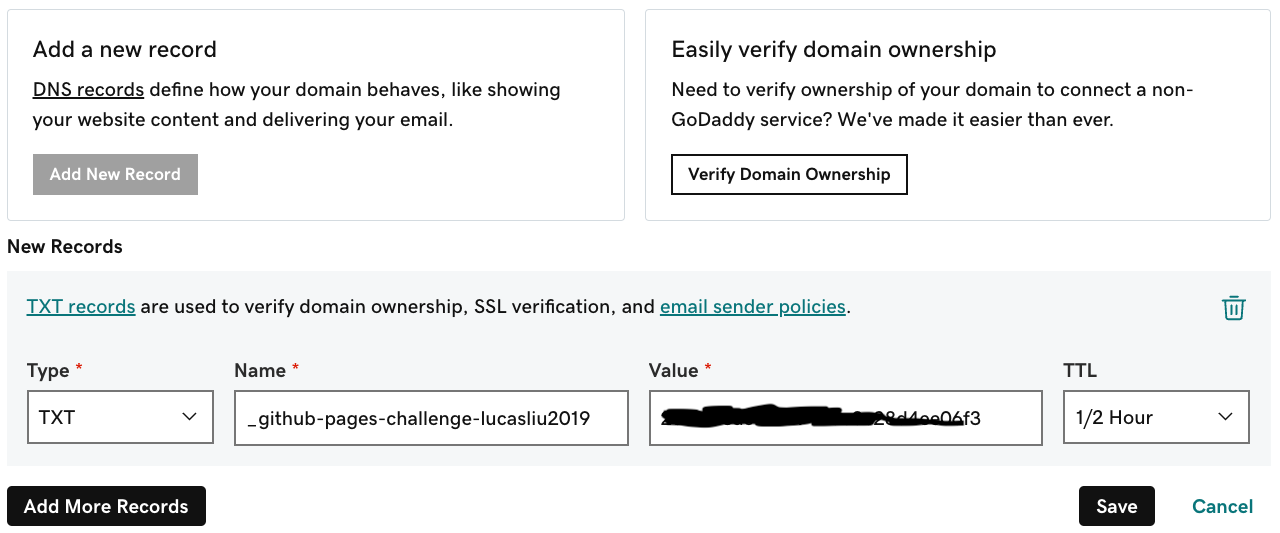
Next, add a TXT record in DNS Management by entering the hostname and the TXT value provided by GitHub.
- Open the DNS Management section of your domain provider (e.g., GoDaddy).
- Click Add Record and select TXT as the record type.
- Enter the hostname and TXT value exactly as provided by GitHub.
Once the TXT record is added, it may take a few minutes for the changes to propagate.
After saving the TXT record, return to GitHub and proceed with verifying your domain:
- Go to the Pages section in your repository’s Settings.
- Click the Verify button to confirm ownership of your domain.
It may take a few minutes for the verification to complete.
If the verification is successful, your custom domain will be successfully linked to your GitHub Pages site.

Additionally, a CNAME file will appear in your repository.

Setup DNS
Once the domain is verified, we need to specify where our host server is by adding more records in DNS. You can find the information on how to do this here from GitHub.
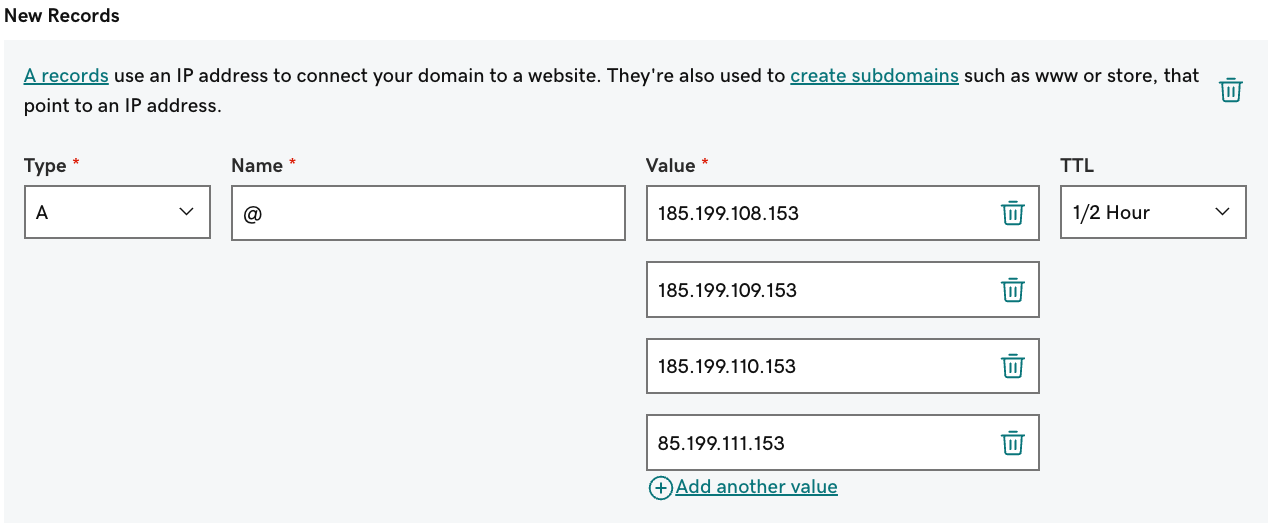
Adding A Records in DNS Manager
We will add four A records with the following IPs:
1
2
3
4
185.199.108.153
185.199.109.153
185.199.110.153
185.199.111.153
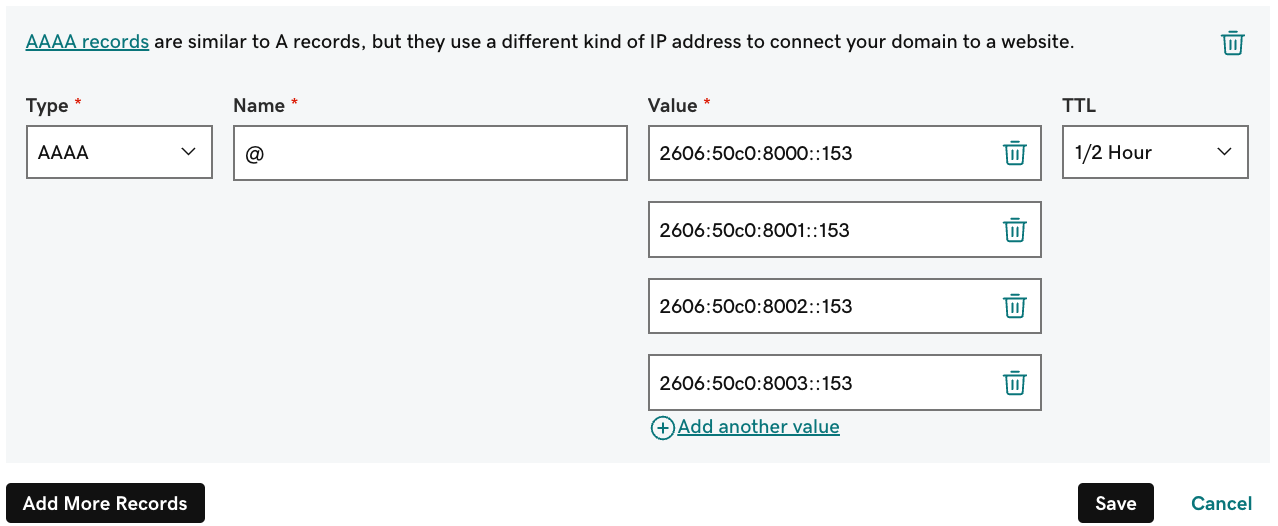
Adding AAA Records in DNS Manager (Optional)
We will add four AAA records with the following IPs:
1
2
3
4
2606:50c0:8000::153
2606:50c0:8001::153
2606:50c0:8002::153
2606:50c0:8003::153
These two steps essentially tell where to look for your website (i.e., the GitHub server IP address).
At this point, if you have already set up your own GitHub page (i.e., the username.github.io page), typing your domain into the browser will fetch the page from the username.github.io repository. If you haven’t set this up yet, that’s fine. We’ll guide you through how to set up any domain or subdomain in GitHub with any repository.
Add CNAME Records in DNS Manager
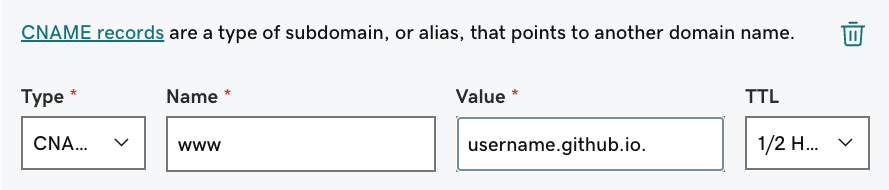
The above step ensures that when you type www.yourdomain.com (e.g., www.wantedbot.com), it will fetch the corresponding file from the repository. Otherwise, you will encounter a “Page Not Found” error.
Setup repository
Go to the repository on GitHub where the website is located. Click the Settings tab.
-
Change the visibility to public (If your repository is already public, you can skip this step).
Scroll down to the Danger Zone section at the bottom of the settings. Click Change visibility to make the repository public.
Asscoiate domain/subdomain with repo
Next, we will show you how to set up your custom domain.
DNS Managment Setup
In case you are using a subdomain of your own domain, we need to add more records. For example, if we want to use blog.yourdomain.com (e.g., blog.wantedbot.com), we proceed as follows:
Then, go to the DNS manager (e.g., GoDaddy in my case). I will add the following two CNAME records (aliases):
-
CNAME record with Name =
blogand Value =username.github.io.
-
CNAME record with Name =
www.blogand Value =username.github.io.
Note: The CNAME record with the name www.blog allows you to type www.blog.yourdomain.com in the browser. Otherwise, you will encounter a “Page Not Found” error.
Github Repository Setup
Now, we will go to the GitHub page.
- Go to the Settings of the repository where the website files are located, then click Pages.
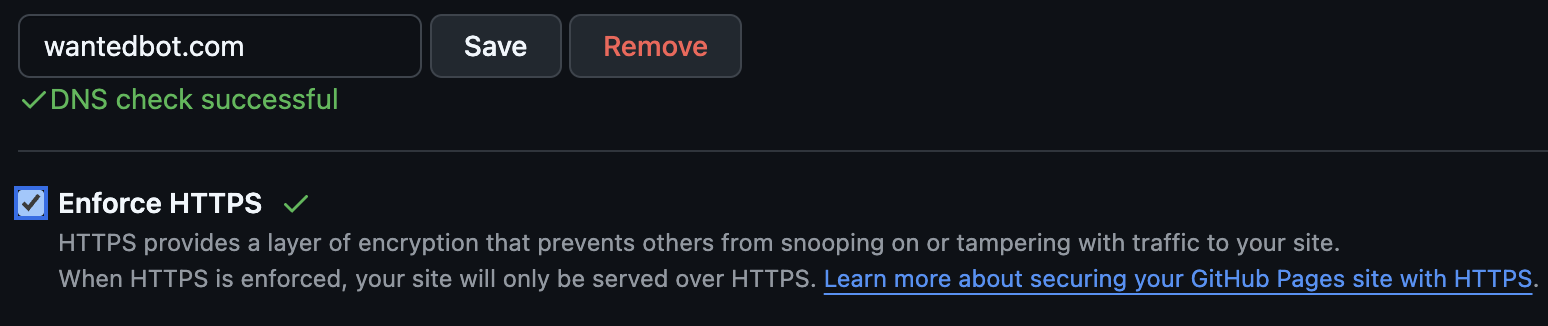
- Under Custom domain, type your own domain to be used and check Enforce HTTPS, as shown in the figure below.
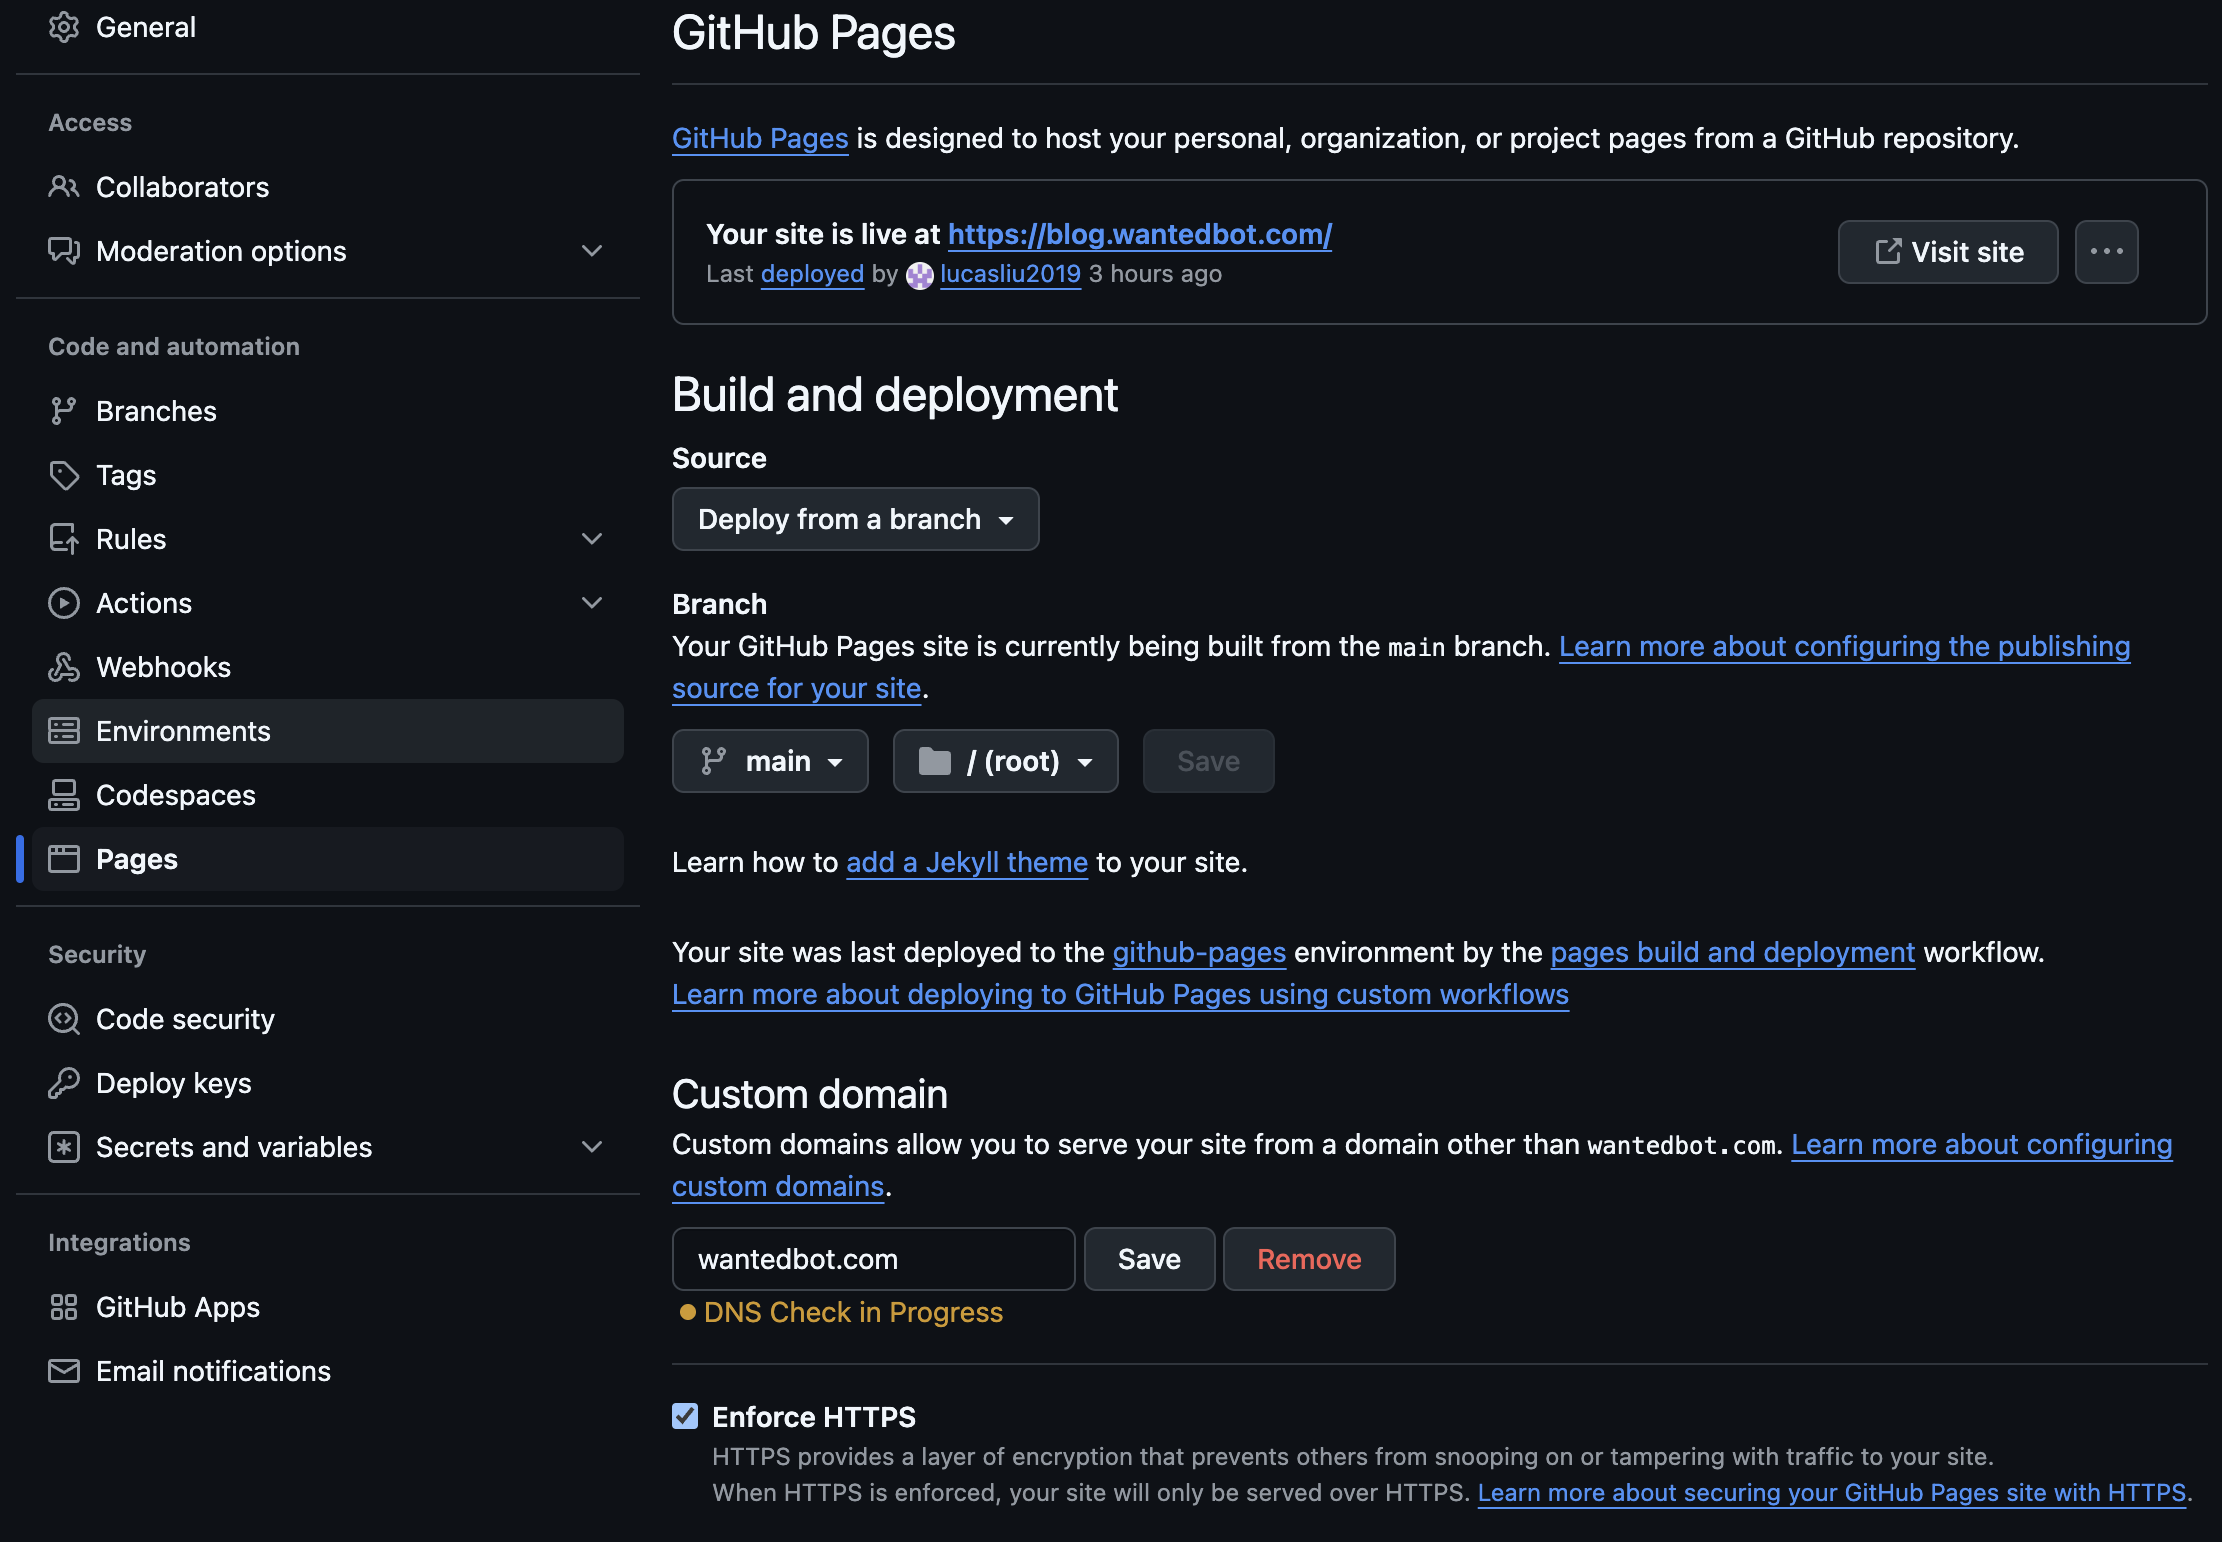
Then, you will see that your domain or subdomain (e.g., www.wantedbot.com) is live.

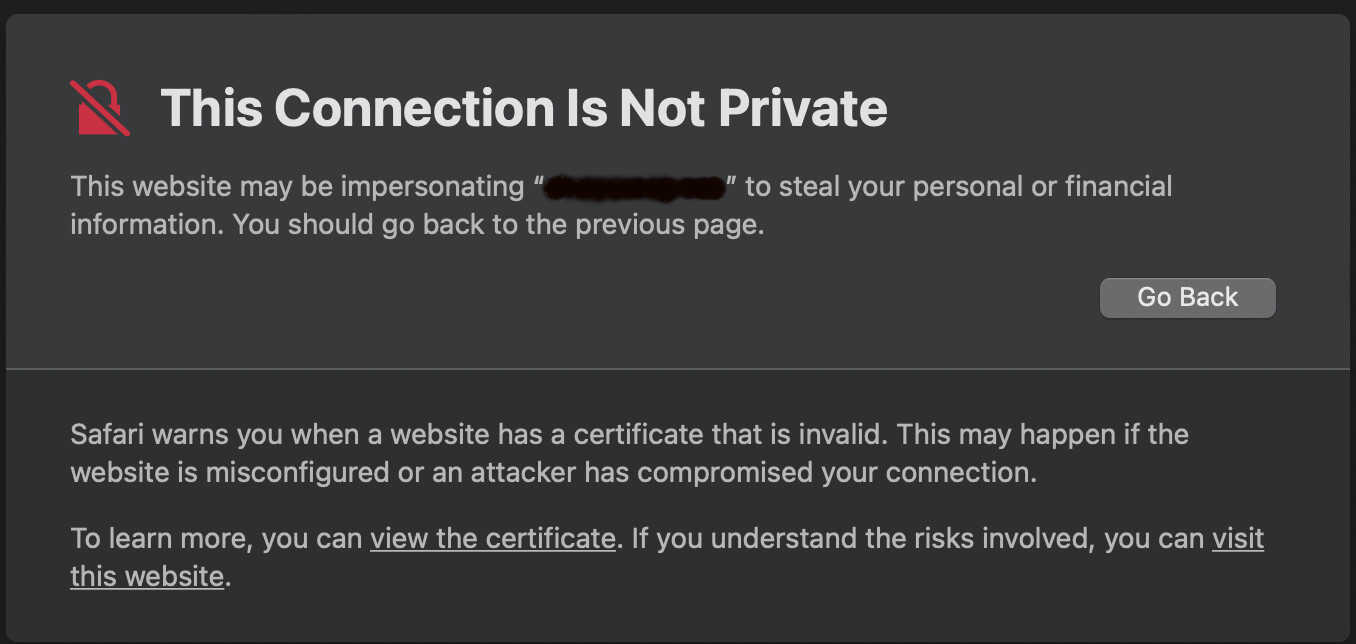
In case you set up your repository with a subdomain, you may encounter the following issue: your connection is not private due to a certificate issue. Try clearing your browser cache to obtain a new certificate. (Make sure Enforce HTTPS is checked.)
Congratulations, you have completed the guide.
Troubleshooting
Why is the subdomain not working when typing www.subdomain.domain.com?
Make sure the www.subdomain CNAME record is added to your DNS records.
Why does the subdomain show “Connection is not private” when typing www.subdomain.domain.com?
Make sure Enforce HTTPS is checked, and try clearing your browser cache.
Check the GitHub page here for additional troubleshooting information.