Free Business Emails on Your Custom Domain
You just bought a domain, but it doesn’t come with an email. I will guide you to set up your email on your own domain.
Requirements
- A Google Gmail account
- A custom domain
Transfer Domain to Cloudflare
This step is important. Cloudflare’s service enables you to use email forwarding to set up custom emails under your domain.
You will need to transfer your domain to Cloudflare. Check the instructions here from Cloudflare.
Double-check the Cloudflare nameservers. Cloudflare’s nameservers are:
1
2
frida.ns.cloudflare.com
jonah.ns.cloudflare.com
You need to go to your domain supplier’s dashboard to set up the nameservers.
Note: It may take some time for the changes to propagate.
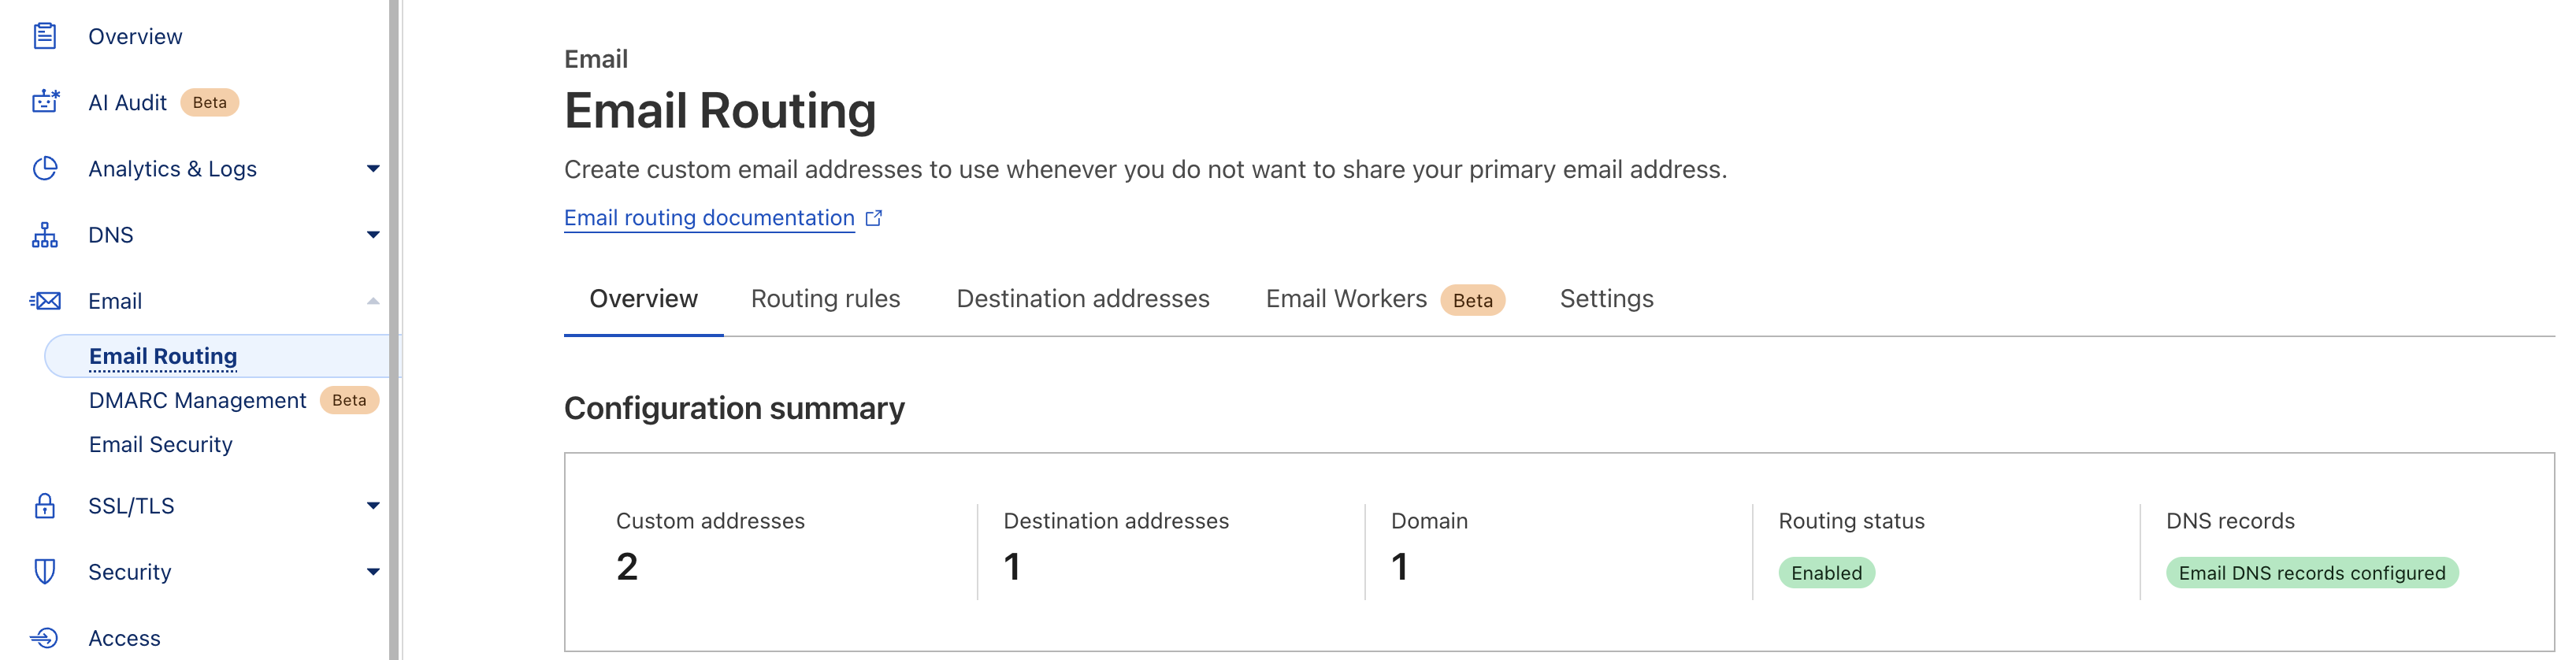
Email Routing
Once your domain is successfully transferred to Cloudflare, you can set up unlimited custom emails under your domain.
- Go to Email -> Email Routing -> Routing Rules.
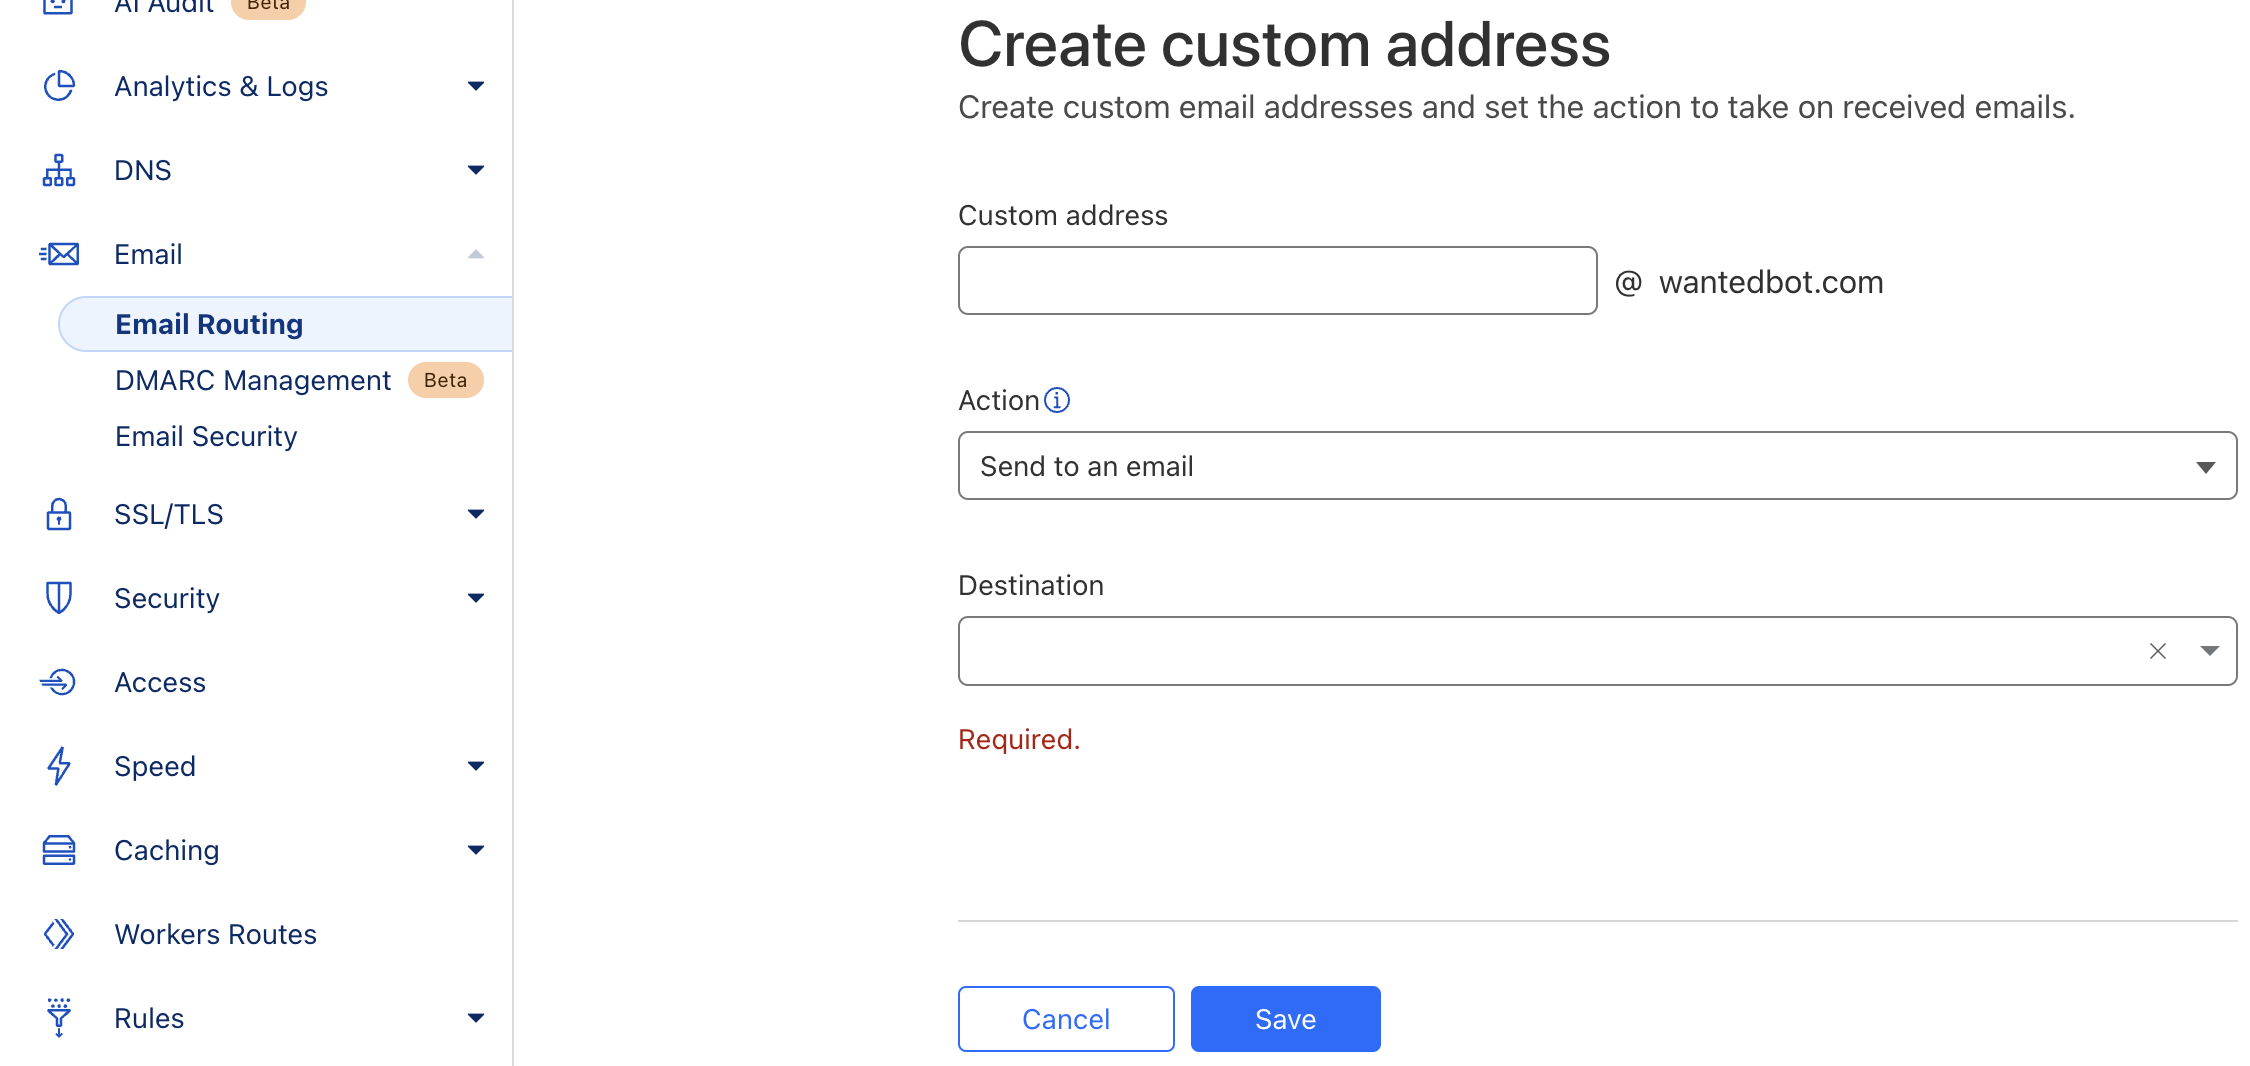
- Add your custom domain under Custom Addresses by clicking Create Address.
- Custom Address: The business address you want under your domain.
- Action: “Send to an email” to forward to another email address.
- Destination: The email address you want to forward to.
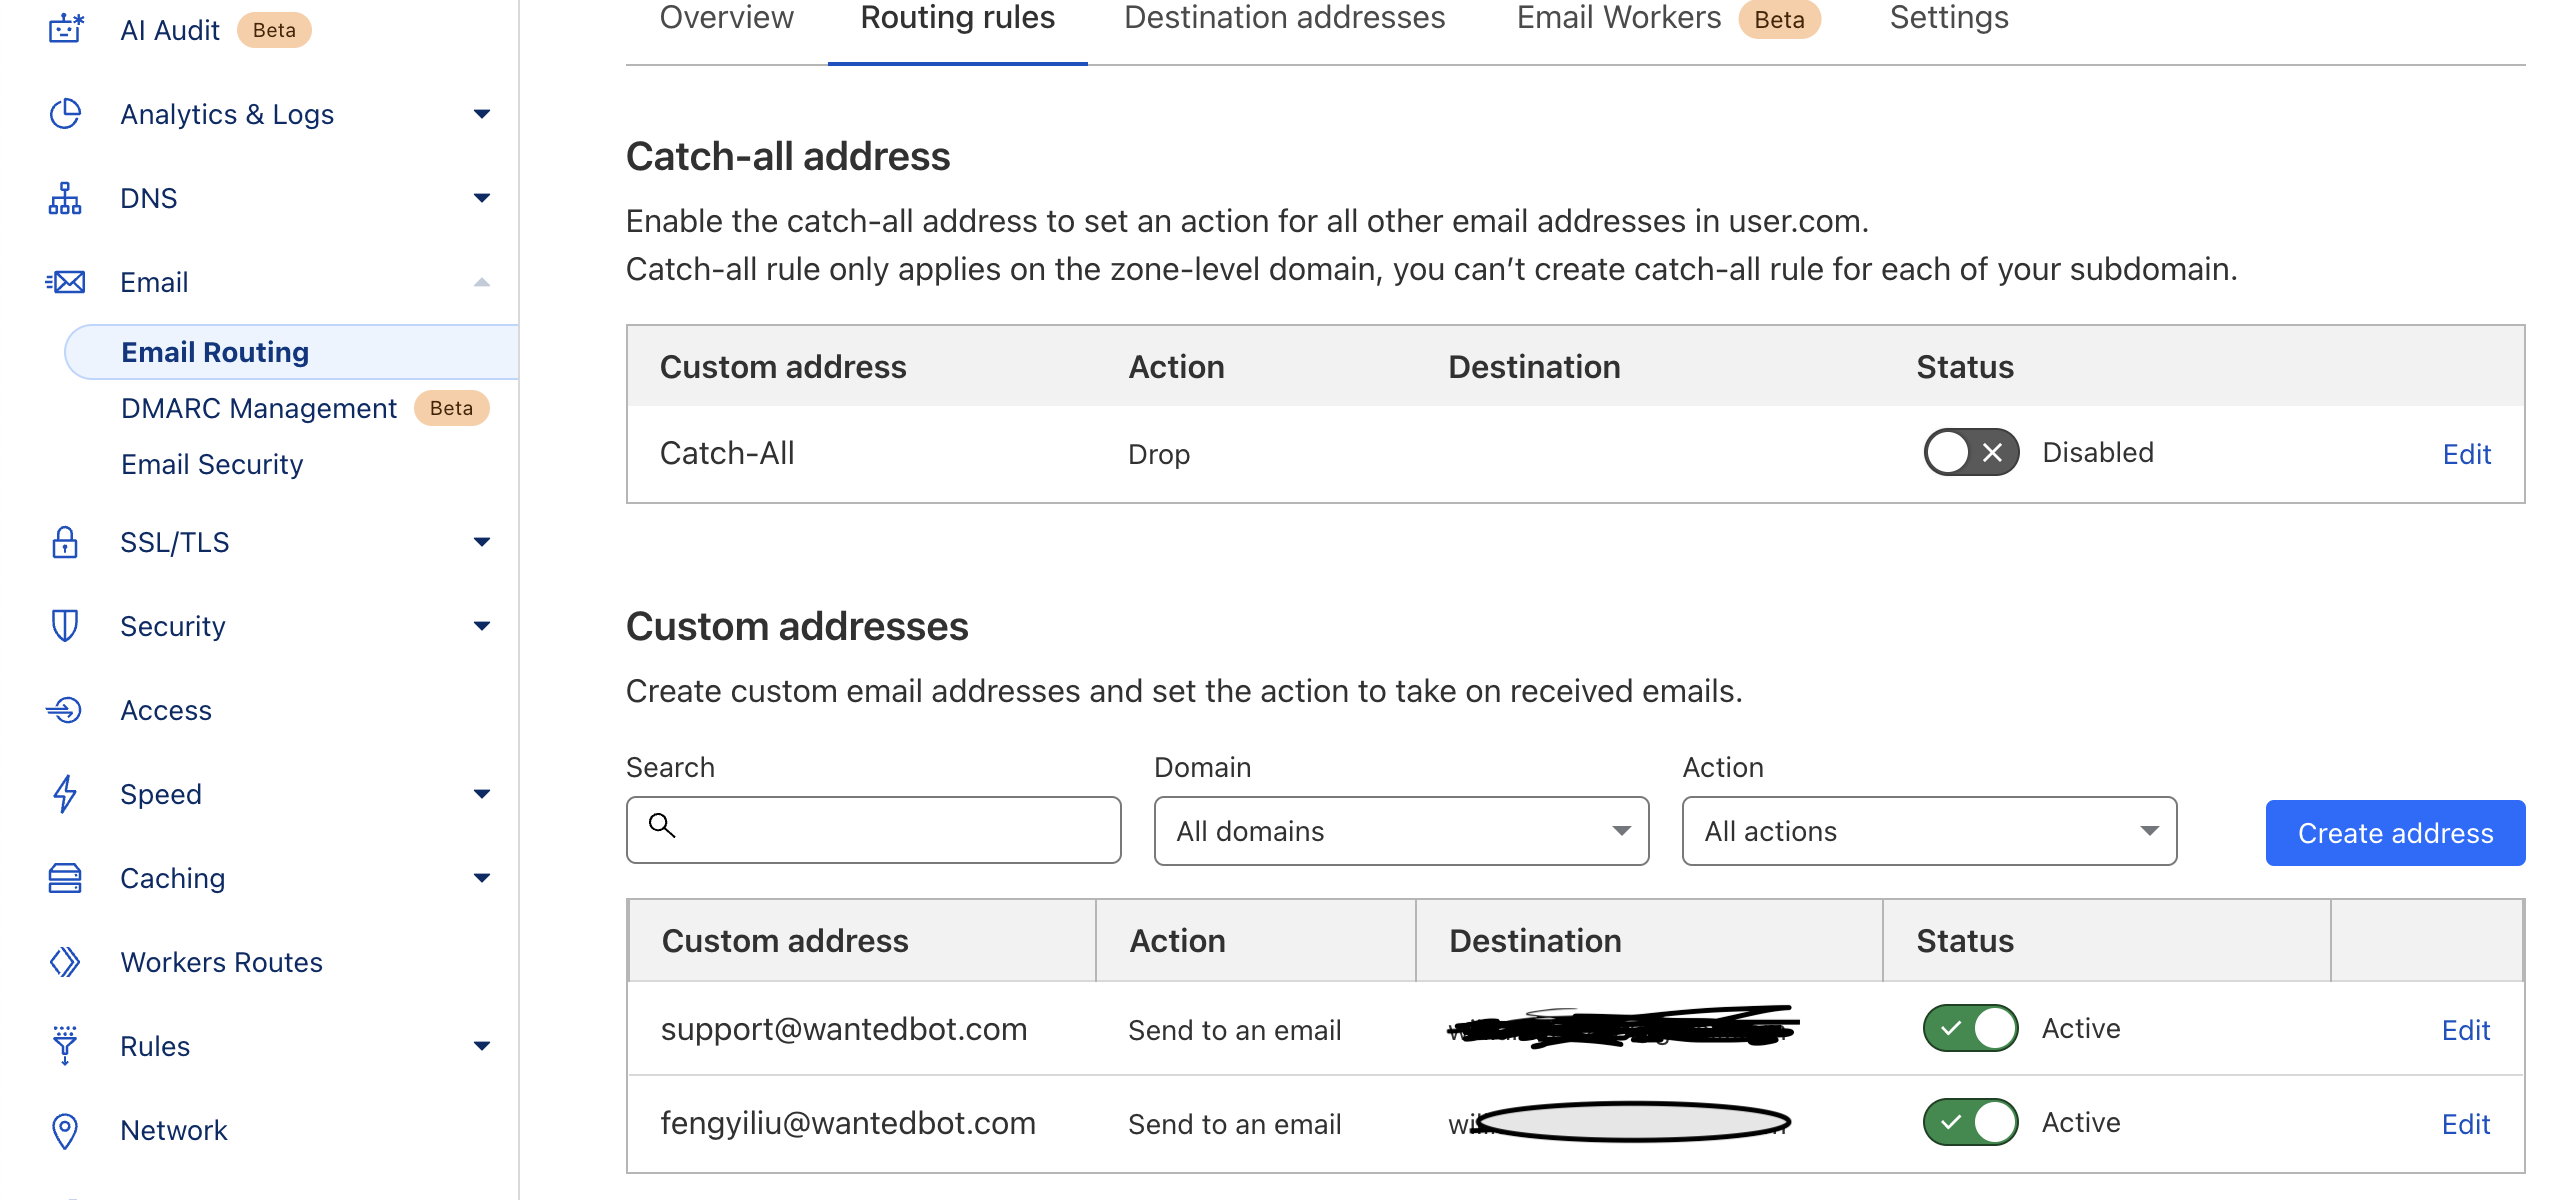
Once added, you need to set up the DNS records. Cloudflare should automatically configure these for you. If you check your email forwarding and it says DNS is not correctly set up, click the prompt, and it will guide you to fix the issue.

DNS Records
Add the following MX records:
1
2
3
4
Type    Name    Content
MX      yourdomain  route1.mx.cloudflare.net
MX      yourdomain  route2.mx.cloudflare.net
MX      yourdomain  route3.mx.cloudflare.net
Add the following TXT records for email authentication (Cloudflare will guide you to set these up):
1
2
3
Type    Name    Content
TXT     _dmrc   ?
TXT     yourdomain ?
Set Up Alias
If you’ve followed all the previous steps, you can now send emails to your custom email address, and they will be forwarded to your destination email. However, when you reply to emails, it will use your destination email address instead of your custom email. To fix this, we will use Google Gmail as the destination email address and alias it with your custom email.
Follow the guide here.
Steps for Google Gmail
- Create an App Password:
- Go to your Google Account settings.
- Navigate to Security -> App Passwords.
- Generate a new app password for Gmail.
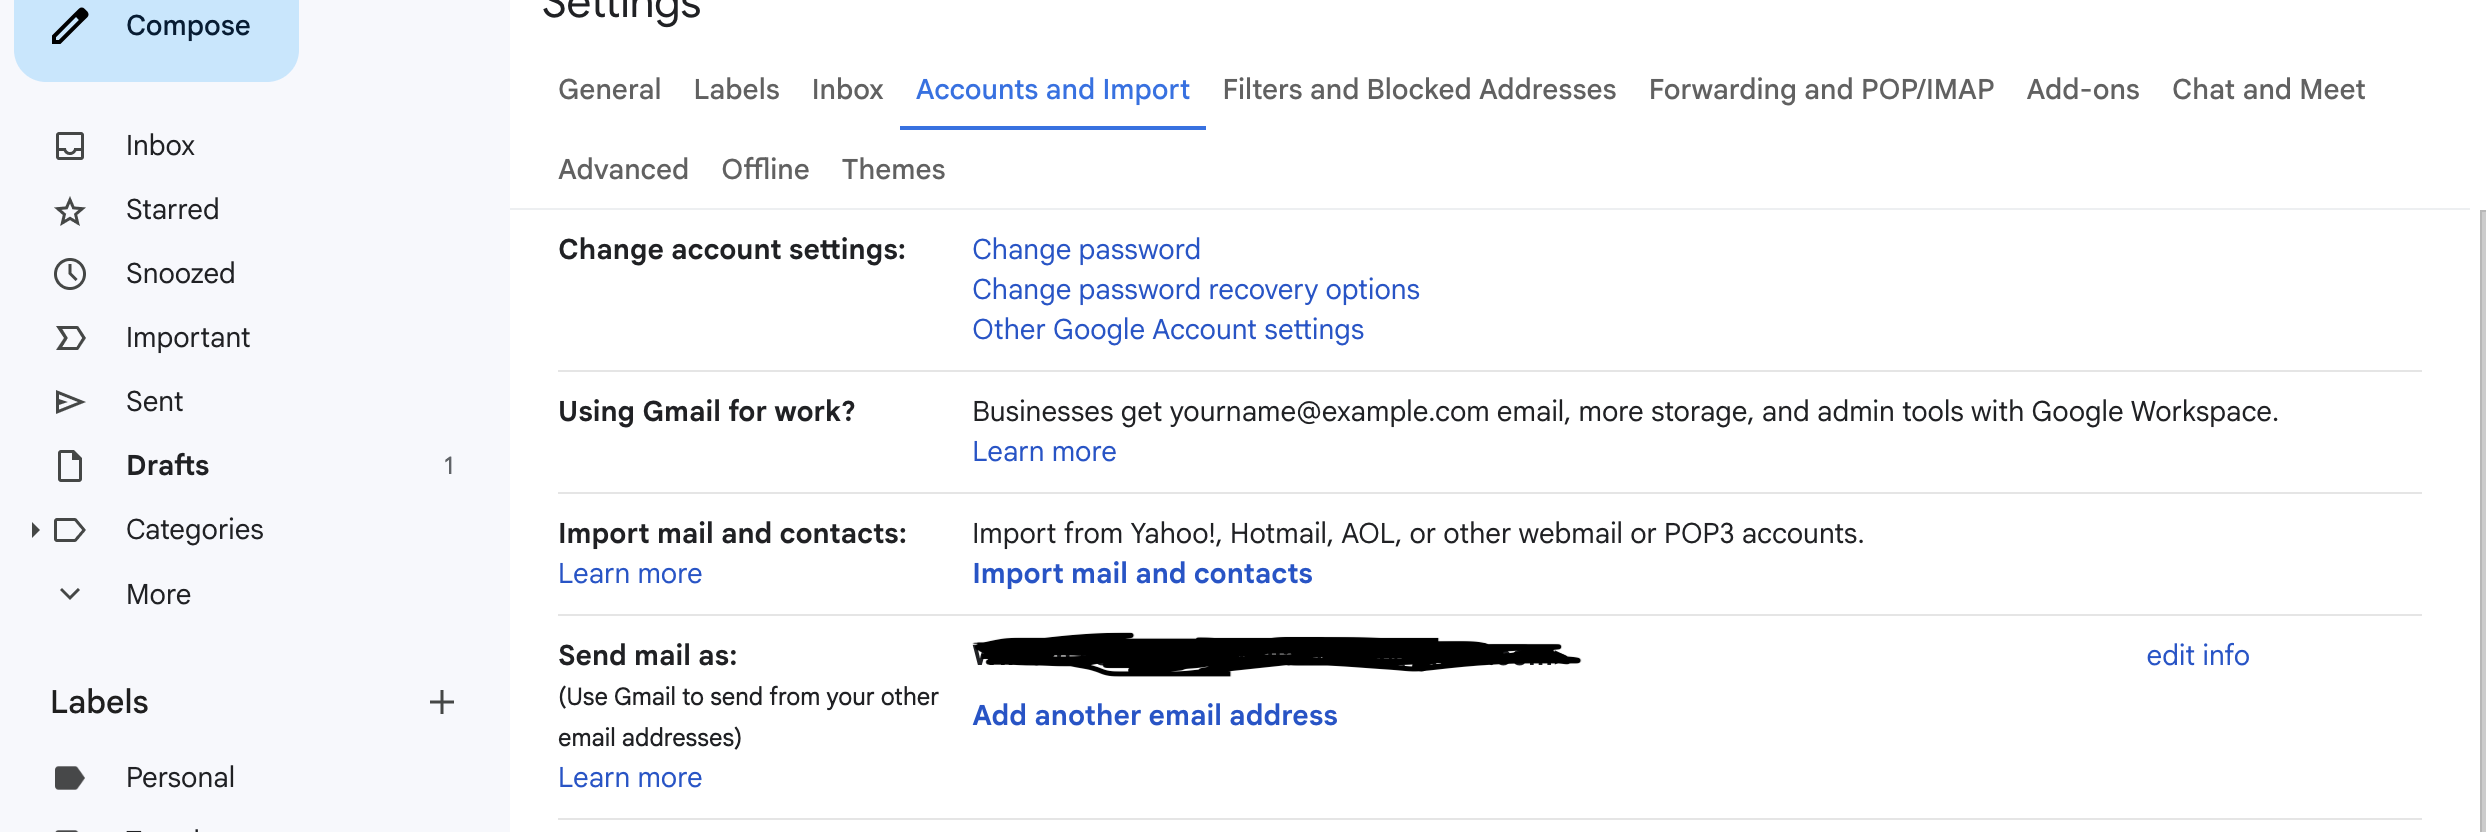
- Set Up Alias in Gmail:
- Go to your Gmail settings.
- Click See all settings.
- Navigate to Accounts and Import.
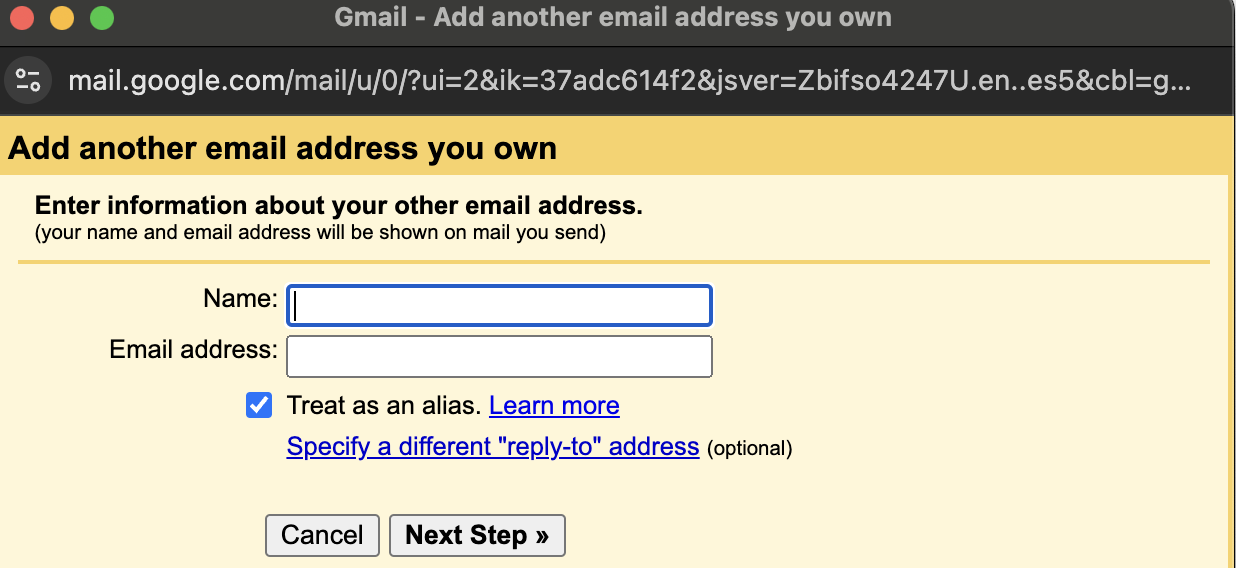
- Click Add another email address.
- Enter your custom email address.
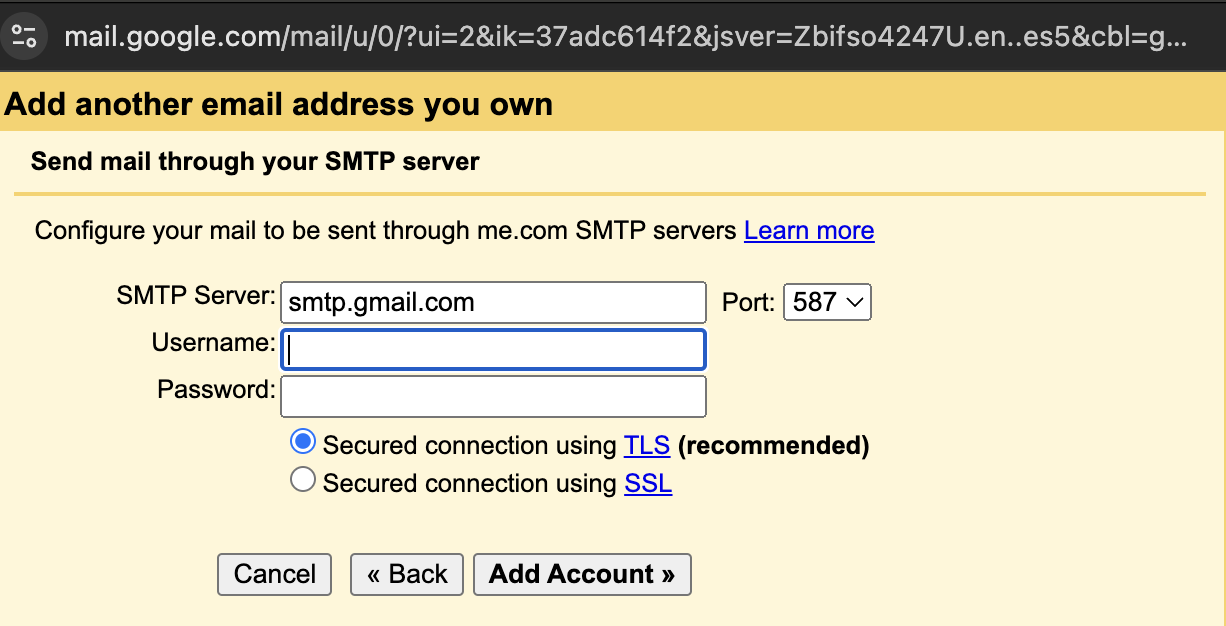
- Use the following SMTP settings:
- SMTP Server:
smtp.gmail.com - Port:
587 - Username: Your Gmail address (including
@gmail.com) - Password: The app password you generated in Step 1.
- Leave TLS enabled.
- SMTP Server:
Screenshots for Reference
-
Gmail Settings:

-
Accounts and Import:
-
Add Another Email Address:
-
SMTP Settings:
Now you can send and receive emails using your custom domain email address! 🚀